Tuesday, November 5, 2024

10 out of 10 or 20/20 Vision??? You decide!

January 2023 saw the commencement of the 10 out of 10 project.  The premise was simple.  Myself and 10 different photographers shot 10 different subjects in my studio with a two hour limit and two outfits.   Some photographers I had worked with before, others not.  Some subjects I had worked with before.... others not. The ultimate aim was to create a body of work of exhibition quality that illustrates how two creatives and one subject can create vastly different works in the same space and time.  A juxtaposition of our skills and vision.

All went along well, shooting one subject a month until number 9.   Whilst in negotiations with my chosen number 9, he suddenly died. Unexpectedly.  Yes, he was an older man, but this was totally unexpected and a tragic loss.  He was known to me as a friend and photographer. The project stalled.  I wasn't ready to find a new number 9, but didn't want to let down the 8 fellow photographers and  subjects already committed to the project.  After some months I realised my replacement number 9 lived very close by. A rough and tumble fellow with a great look and being local should not have been too hard to organise.  

I was wrong.  He was always keen to shoot, but timing was an issue.  He couldn't do this day, or that.  He needed a haircut, but couldn't get happening and some weeks down the track it became obvious that he was terminally ill and ..... he too died before the shoot could take place.  

Mortified I felt the universe had spoken and this was not to be.  More months elapsed, but I approached no-one to participate.  Then one night I was out to dinner with my mate Joshy when I spied a fellow at the Yacht club.  Ballsy as ever, I forced my business card into his hand and asked him to look at my website and consider being part of the 10 out of 10 project.   Well wasn't I surprised when just 2 days later he rang me!! I was elated!  

With number 9 now "in the can" my aim was to finish off the project. Number 10 came to fruition after a luncheon at a different club (yes, I know, it sounds like all I do is eat and shoot). Number 10 was sat beside me at lunch and number 10 photographer was at the other end of the same table.  It just seemed so natural and I asked if she would be number 10.  As they say, the rest is history!


The project is finished. 


Or is it?


Should I continue?  


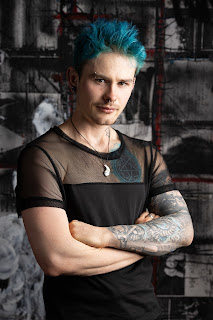
Here are some of my images of the original 10. 

What do you think? Should it become 20/20 Vision?


Studio reno

 The studio out the back of mine was once a granny flat, but ohhhhh how times have changed!  


In the recent bathroom renos, the bathroom in the studio also received a mini makeover with new toilet, vanity and tap sets including a sexy new rainwater shower head!   This offers the subjects and sitters and nice clean bathroom and a place to wash off body paint, oil and tinsel used in some of the more creative shoots.  In the once bedroom, now changeroom, I removed the 3 sliding wardrobe doors on the built in robe to open the whole hanging space to make outfit selection a bit easier. I also added a shelf above the hanging rack for props such as umbrellas and angel wings.  To one side I added translucent storage boxes for non hanging garments, boudoir accessories, swathes of fabric and props too big for the storage system in the Ikea Expedit system on the opposite wall.   

The biggest change though was the installation of a ceiling mounted backdrop system that holds 4 rolls of paper or fabric that are raised and lowered by a chain pulley system.   After much research I chose the Lighter 4 Hook Expansion system from Dragon Image in Sydney.   I specifically wanted a system that came complete with the aluminium inner tubes for holding both paper and fabric.  Without the inner tubing the paper rolls sag when humidity and age cause the paper role cardboard core to soften. This causes damage the paper roll with creasing.   I had it all delivered to the studio with an 11 metre roll of  Savage "Thunder Grey" paper and I must say the ordering, payment and delivery was super smooth.  One option was to swap out the plastic pulley chain with a metal version.  I ummed and ahhhed over that choice.  The metal chains added and extra $340 to the outlay of $550, plus delivery and I couldn't see what advantage they gave.  I have not been disappointed with the plastic chains and have no regrets in my decision.

I'm pretty handy with a drill, but I also am aware of my limitations and affixing the hooks to the ceiling was not a job I felt equipped to attempt so I outsourced that part to my local chippy who was very diligent win affixing the hooks into the ceiling joints.  He did a great job, fast and efficient and the tubes did need to be trimmed down slightly to ensure the hooks were in the best place for a secure hang.   The cost was minimal, I think it was $100 as a Saturday morning cashie.  Loading the paper rolls onto the aluminium tubes was an easy task.  Taping the fabric backdrops to the tubes was not fun, but with the aid of Moo we got it done.   It's not perfect and still need a little tweaking.   I do like a mix of fabric and paper, but for expedient hanging the paper wins every time!  Thunder grey can become pretty much any colour you like with a well placed strobe and gel.  

One thing that did change when I moved from a tripod based system to the ceiling mount was the orientation of the studio.  It was east/west, but the mount made a north/south hang easier and so I now have a shooting areas just over 5metres long and up to 3 metres wide.   This is wider than I could shoot before so a real advantage for groups.

As a part of the reno I bought new lights and modifiers too, sticking with the brilliant Elinchrom brand, but more on that in another post.  As part of the reno I needed a better system for storing the modifiers than leaving them folded up in a cupboard.   That can seriously ruin the flow of a shoot when you have to stop and break down one modifier and build another.  I deal with that simply by hanging them on the walls. Initially I wanted to create wall mounted hooks on a 3d printer in the Elinchrom pattern, but it was easier to use a mix of adhesive and screwed hooks.  I tried the Commander system first and it holds 80% of my modifiers, but the heavier soft boxes and beauty dishes were just too heavy and after a couple failed I moved to a wallmate screw system.  Works a treat and all the modifiers are ready to use in an instant.  

Absolutely love the new set up and have been shooting a lot more than pre renovation.  So when offered a second set of ceiling mount backdrop hangers second hand I grabbed them.   Having seen how the first lot went up I, with the assistance of Mr Next Door, mounted the second set.  They did not come with aluminium centre poles, so I hit Bunnings and bought 50mm poly pipe.   Using my trusty Ryobi tools I cut them to size and they now house 2m backdrops where I can use both natural and ancillary lights.