January 2023 saw the commencement of the 10 out of 10 project. The premise was simple. Myself and 10 different photographers shot 10 different subjects in my studio with a two hour limit and two outfits. Some photographers I had worked with before, others not. Some subjects I had worked with before.... others not. The ultimate aim was to create a body of work of exhibition quality that illustrates how two creatives and one subject can create vastly different works in the same space and time. A juxtaposition of our skills and vision.
All went along well, shooting one subject a month until number 9. Whilst in negotiations with my chosen number 9, he suddenly died. Unexpectedly. Yes, he was an older man, but this was totally unexpected and a tragic loss. He was known to me as a friend and photographer. The project stalled. I wasn't ready to find a new number 9, but didn't want to let down the 8 fellow photographers and subjects already committed to the project. After some months I realised my replacement number 9 lived very close by. A rough and tumble fellow with a great look and being local should not have been too hard to organise.
I was wrong. He was always keen to shoot, but timing was an issue. He couldn't do this day, or that. He needed a haircut, but couldn't get happening and some weeks down the track it became obvious that he was terminally ill and ..... he too died before the shoot could take place.
Mortified I felt the universe had spoken and this was not to be. More months elapsed, but I approached no-one to participate. Then one night I was out to dinner with my mate Joshy when I spied a fellow at the Yacht club. Ballsy as ever, I forced my business card into his hand and asked him to look at my website and consider being part of the 10 out of 10 project. Well wasn't I surprised when just 2 days later he rang me!! I was elated!
With number 9 now "in the can" my aim was to finish off the project. Number 10 came to fruition after a luncheon at a different club (yes, I know, it sounds like all I do is eat and shoot). Number 10 was sat beside me at lunch and number 10 photographer was at the other end of the same table. It just seemed so natural and I asked if she would be number 10. As they say, the rest is history!
The project is finished.
Or is it?
Should I continue?
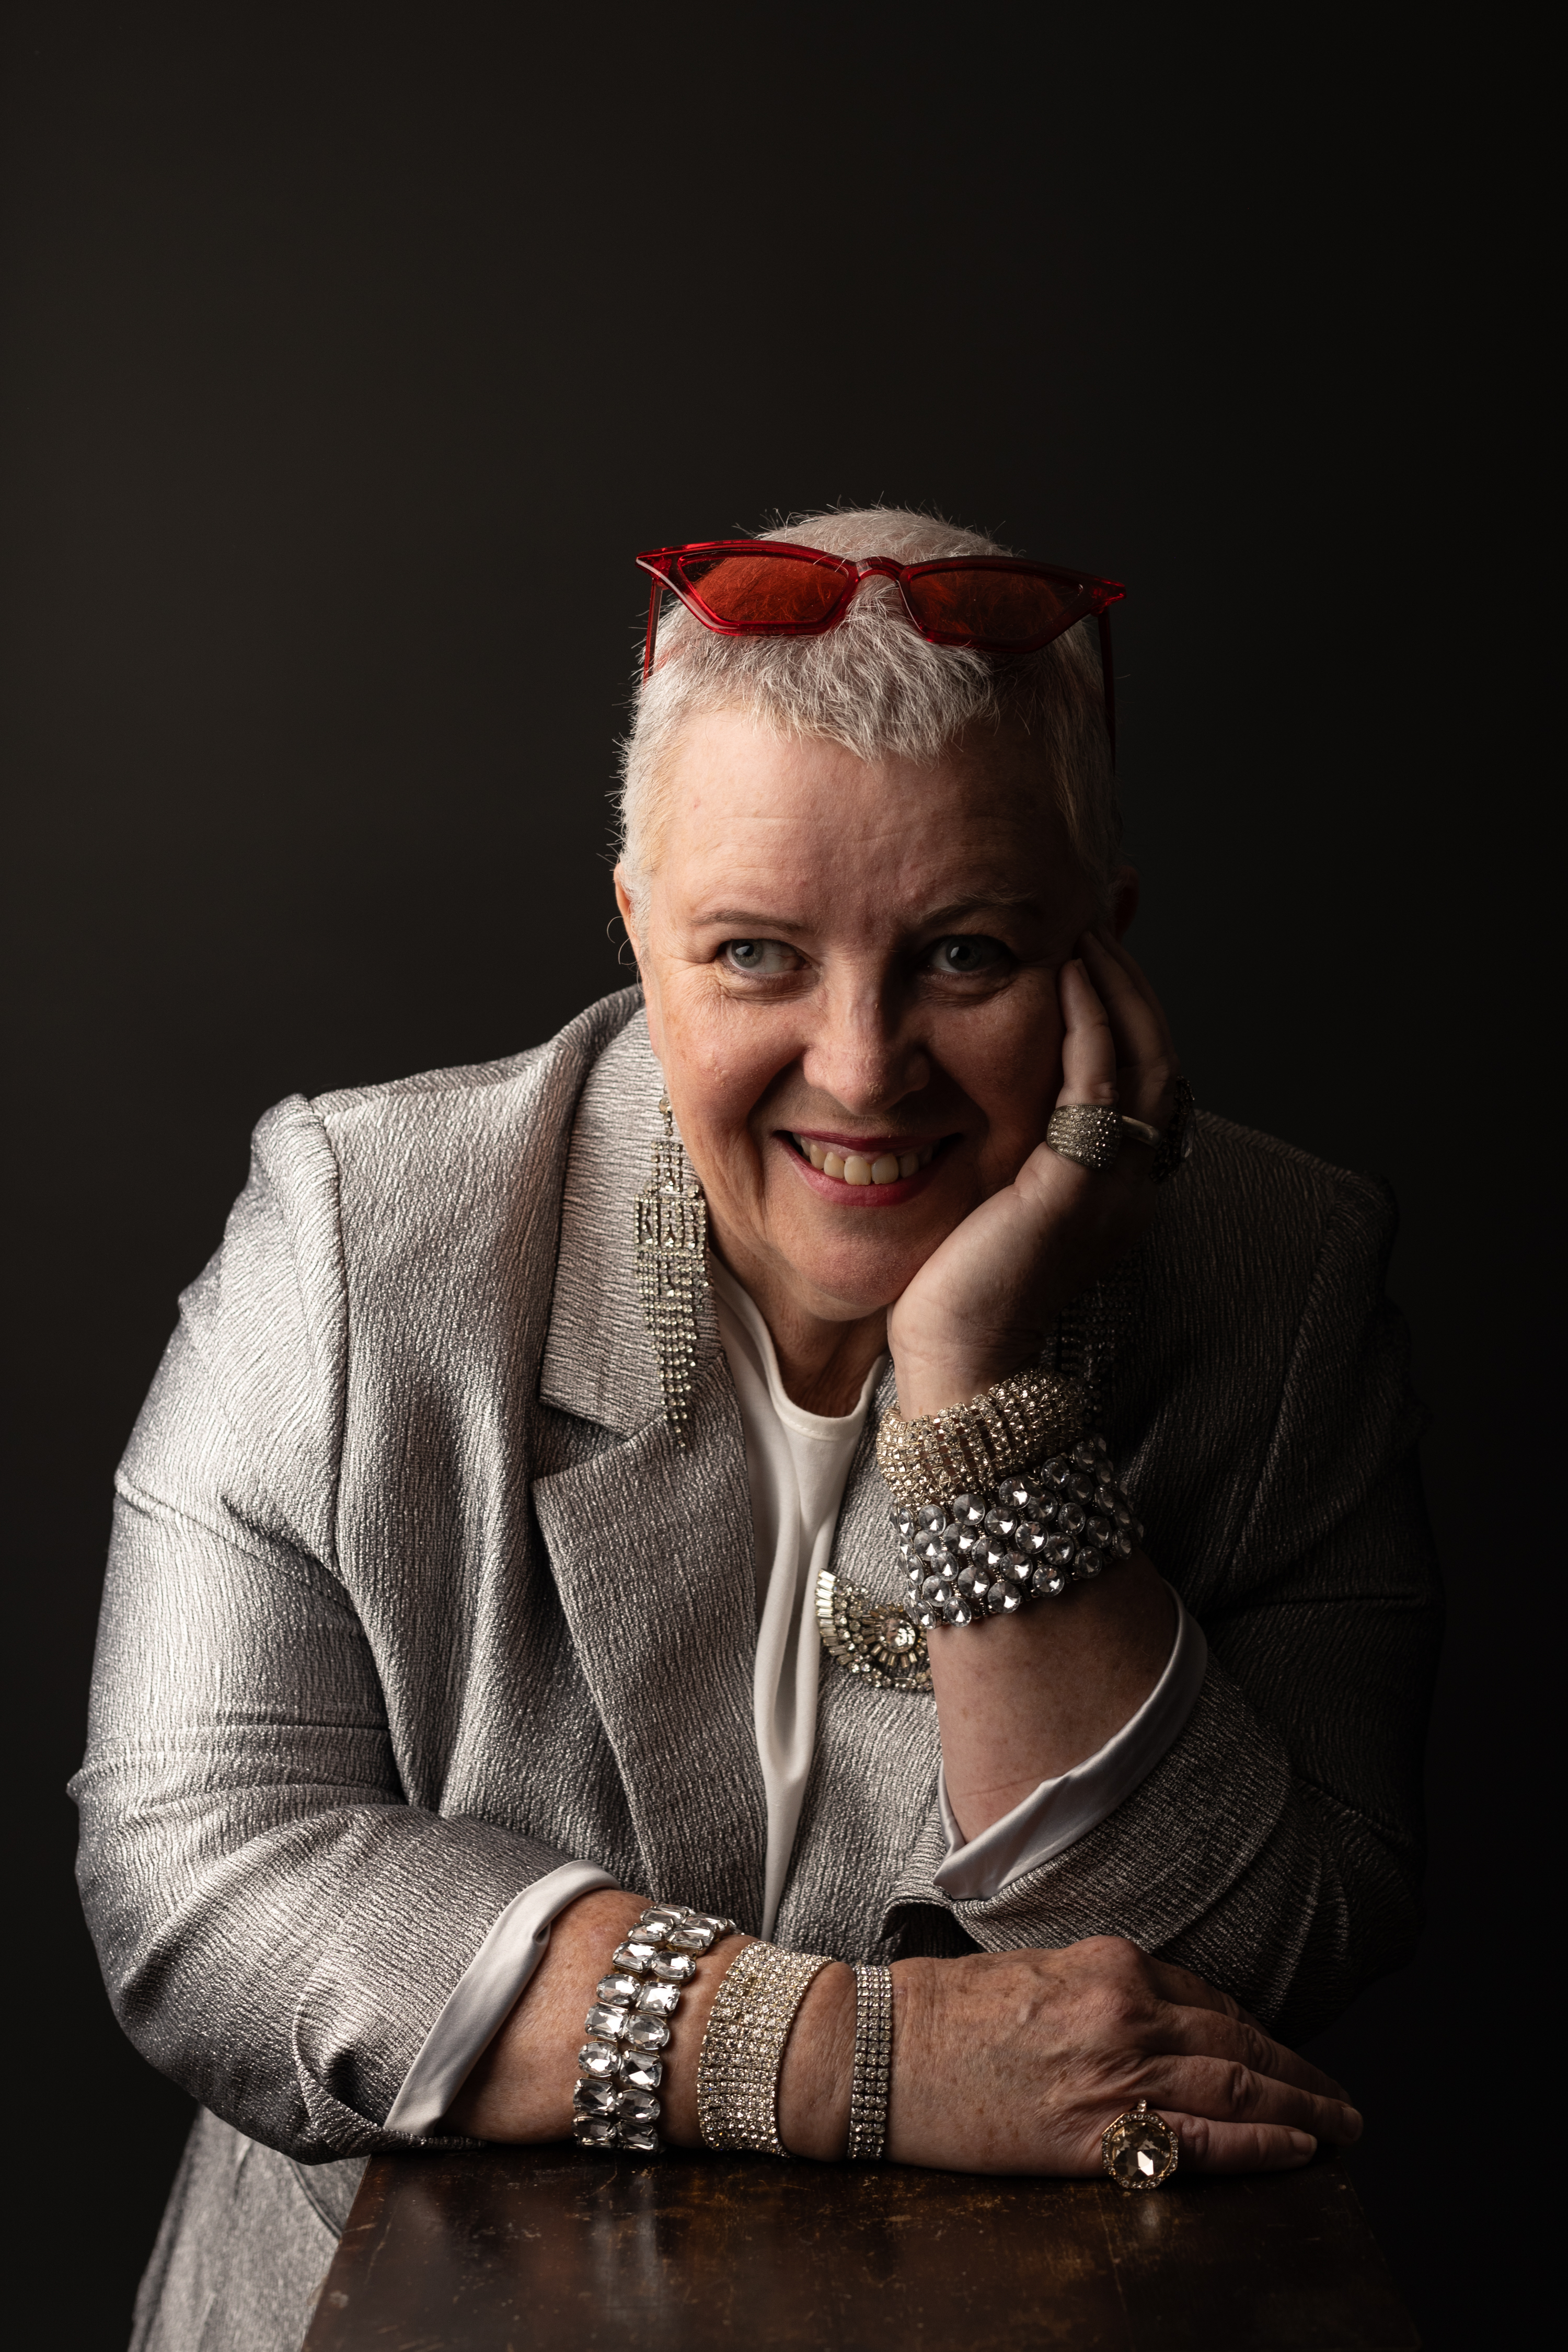
Here are some of my images of the original 10.
What do you think? Should it become 20/20 Vision?